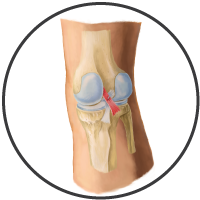
PCL Tear InformationEverything you need to know about treating and healing your PCL Tear

Share This:

Taping the PCL

Content:

Taping an injury like a PCL strain or tear can help provide your damaged tissue with support and protection. It can also help relieve swelling throughout the day and is even thought to improve movement during physical activity.


It’s best to try several different taping applications for your PCL injury before settling on one. This will help you figure out which one works best for you. There are many examples online, including instructional videos. Here's a PCL taping application we found effective:

PCL Taping

Taping a PCL Tear

  1. Take a full length piece of tape (about 10 inches long) and cut it in half, rounding the corners, so you have two pieces that are each about 5 inches long.
  2. Bend your knee to 90° and take one of the 5 inch strips, tearing the backing in the middle and peeling it away so you’re holding onto the two anchor ends.
  3. Apply the tape horizontally just below your kneecap, using 80% stretch in the middle and no stretch at the ends.
  4. Take the other 5 inch strip and tear the backing in the middle, peeling it away so you’re holding onto the two anchor ends.
  5. Apply the tape horizontally just below your kneecap, directly over top of the first piece you applied, using 80% stretch in the middle and no stretch at the ends.
  6. Take a full length piece of tape and measure it from the right side of your kneecap up to your thigh.
  7. Tear the backing off the end at your thigh and anchor it onto your quad muscle, using no stretch.
  8. Using 25% stretch, pull the tape down along the outside of your kneecap.
  9. Once the tape is even with your knee, use 50% stretch and let the tape follow the bottom of your kneecap, around to the opposite side of your knee.
  10. Lay down the end of the tape with no stretch, then rub the tape in to ensure it sticks.
  11. Use the technique described in Steps 6-10 for the left side of your knee.